Building Your Dream 6x8 Gable Shed: A Comprehensive DIY Guide
Tired of cluttered garages and overflowing storage spaces? Dreaming of a dedicated area for your tools, gardening equipment, or outdoor recreational gear? Building your own 6x8 gable shed is a rewarding project that's more achievable than you might think. This guide provides detailed, step-by-step instructions, turning your vision into a sturdy, functional reality. Get ready to roll up your sleeves and experience the satisfaction of creating something lasting with your own two hands!
Phase 1: Planning and Preparation â€" Laying the Foundation for Success
Before you even touch a saw, thorough planning is crucial. This phase sets the stage for a smooth and efficient build. First, secure the necessary permits from your local authorities; this avoids costly delays and potential legal issues. Next, choose your building site carefully, ensuring level ground and easy access for materials delivery. Consider drainage and proximity to utilities. Then, create detailed plans, sketching out the dimensions, door placement, and any desired features like windows or shelves. Using pre-made shed plans available online can simplify this process. Finally, gather your materials list, meticulously noting quantities of lumber, fasteners, roofing materials, and any additional components. A well-organized list minimizes trips to the hardware store and keeps your project moving smoothly.
Essential Tools for the Job
Having the right tools at your disposal is paramount. Invest in or borrow these essentials: a measuring tape, level, saw (circular saw or hand saw), hammer, drill, screwdriver bits, post hole digger or auger (depending on your foundation type), shovel, safety glasses, work gloves, and a speed square. A quality hand saw can handle smaller cuts, while a circular saw significantly speeds up the process for larger pieces of lumber. Don’t forget a sturdy work table or sawhorses for safe and comfortable working conditions!
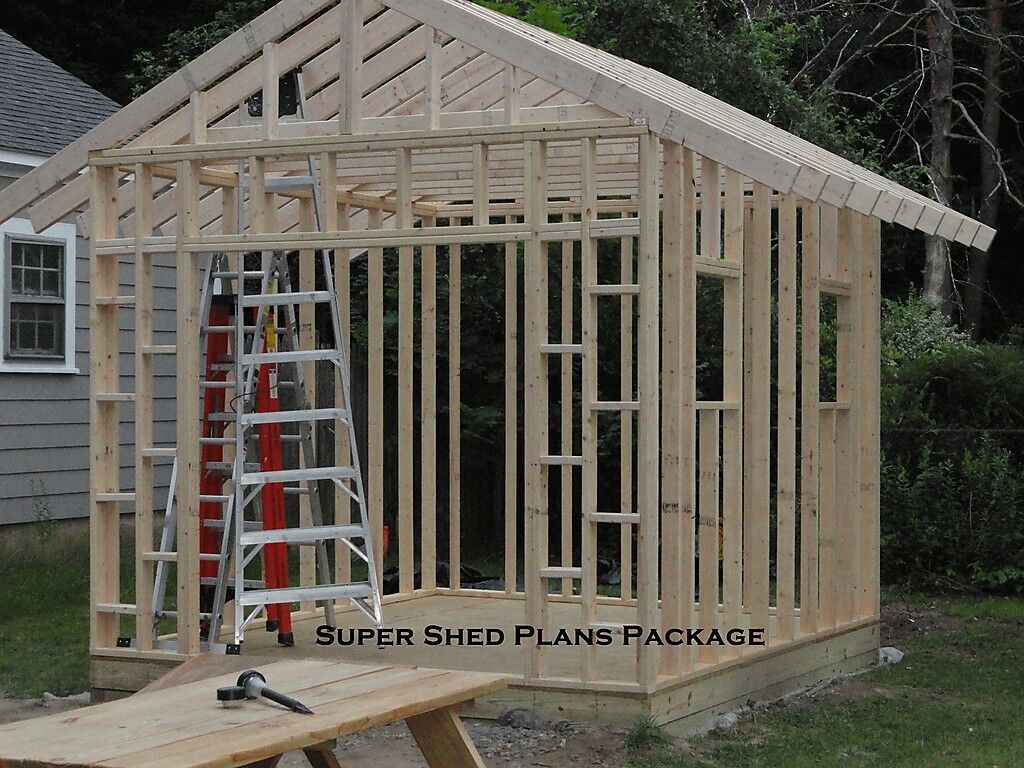
Phase 2: Foundation and Framing â€" Building the Shed's Skeleton
Your shed’s foundation forms the bedrock of its stability. Several options exist, each with its own pros and cons. A simple gravel base offers a cost-effective solution, requiring compacting gravel to a level surface. For a more robust structure, consider a concrete slab or treated lumber foundation. Once your foundation is prepared, you'll begin framing. Start by constructing the floor frame using pressure-treated lumber, creating a strong and level base. Then, erect the wall frames, ensuring plumbness and squareness at every stage. Finally, build the roof trusses, following your plans precisely to achieve the desired gable roof shape. Double-check your measurements frequently to ensure everything aligns properly. Accuracy at this phase prevents costly mistakes down the line.
Working with Lumber: Tips and Tricks
Successful shed building hinges on proper lumber handling. Always use pressure-treated lumber for the foundation and framing to protect against rot and insect damage. Before assembling, check your lumber for any imperfections; avoid using damaged or warped pieces. Pre-drill pilot holes before driving screws to prevent wood splitting. And remember to use the appropriate fasteners â€" longer screws for thicker lumber and shorter ones for thinner pieces. Employing these techniques will guarantee a strong and durable structure.
Phase 3: Sheathing, Roofing, and Finishing Touches â€" Adding the Finishing Flourishes
Once the frame is complete, install OSB (Oriented Strand Board) sheathing over the walls and roof, providing a solid surface for the exterior cladding. Then, apply your chosen exterior siding â€" options range from simple plywood to more aesthetically pleasing materials like vinyl or metal. Next, install the roofing materials, ensuring proper overlap and secure fastening to protect against the elements. Finally, add the doors and windows, and install any interior features like shelves or workbenches. Remember to always follow the manufacturer’s instructions for each material.
Roofing Considerations
Choosing the right roofing material depends on your budget and aesthetic preferences. Asphalt shingles offer a cost-effective and readily available option. Metal roofing provides greater durability and longevity but is typically more expensive. Whichever you choose, ensure proper ventilation to prevent moisture buildup and extend the life of your roof.
Phase 4: Final Inspection and Enjoyment â€" The fruits of your labor!
Before celebrating your accomplishment, perform a thorough final inspection. Check for any loose screws, gaps in sheathing or siding, and any other potential issues. Make necessary repairs to ensure a structurally sound and weather-tight shed. Once you're satisfied, clean up the construction debris and admire your handiwork. Congratulations â€" you've successfully built your own 6x8 gable shed! Now, enjoy the added storage space and the immense satisfaction of a job well done.
Remember: safety is paramount. Always wear appropriate safety gear, follow all manufacturer instructions, and seek assistance when needed. This guide provides a general framework; specific details may vary based on your chosen materials and design preferences. Happy building!
0 comments:
Post a Comment
Note: Only a member of this blog may post a comment.